
How to Install Remo+ RemoBell S Video Doorbell: Step-by-Step Guide with Video
How do I install my Remo S doorbell?
If you have purchased the Remo+ RemoBell S smart video doorbell, you can check the step-by-step setup guide here to help you install your doorbell ASAP (WITH A SETUP VIDEO).
Besides, we also summarize the frequently asked questions about RemoBell S video doorbell so that you can troubleshoot the possible issues easily!
#1. A-Z Guide to Install RemoBell S Doorbell
#2. Hottest RemoBell S Video Doorbell FAQs
#1. Best Setup Guide to Install Your Remo+ RemoBell S Video Doorbell
We will include the hardware installation part and software configuration part in this guide here.
You are gonna get the video tutorials to help you finish the installation process in 15 minutes.
Items You’ll Need for Installing Remo S Smart Doorbell
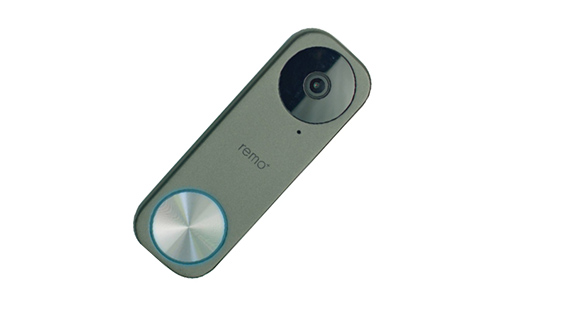
. Remo S doorbell
. The wall mount
. The 15° angle mount
. The 5° wedge mount
. The mount foam (optional)
. The power kit
. A Screwdriver
. Mounting screws & anchors
. Security screws
. Extension wires
. Wire nuts
. A bubble level
. The optional mount types
. The safety fuse for hard surfaces (like brick, stucco, etc.)
. The 5 mm drill bit (included)
. A drill (not included)
. A pencil for marking drilling points
Most of the items are included in the package so you don’t need to spend too much on purchasing any accessory.
Before you head to install your Remo S smart video doorbell, please check your current digital or mechanical doorbell’s voltage. Remo S doorbell only works with 16 V — 24 V.
If your current doorbell’s voltage doesn’t meet the 16 V — 24 V, you can buy a doorbell transformer.
Also, Turn off the power in your breaker box to prevent electric shock.
Step 1. Install the Power Kit
Install the power kit to your mechanical chime box. If you don’t have a chime, you can skip this step.
1). Remove the chime cover, loosen the screws and remove the wires. After that, straighten the exposed end of the wires.
2). Insert one end of the wire harness into the power kit. Connect the wire harness to the chime terminals.
3). Insert an exposed end of the wire harness and one chime wire into the wire nut and twist it tightly.
You can check the step-by-step guide to wire a doorbell.
4). Repeat with the remaining wires.
5). Place the power kit so that it won’t interfere with the moving parts or muffle the chime. You can use the adhesive backing to hold it in place.
6). Install the chime box cover back.
Step 2. Install Your Remo S Video Doorbell

1). Remove your existing doorbell and disconnect the wires.
2). Adjust your video doorbell camera’s viewing angle by choosing the proper mount type, based on your doorbell location.
Note: For hard surfaces (like stucco or brick), paste the mounting foam to the back of the wall mount.
The 15° angle mount is suitable for improving the motion detection and having an ideal view of visitors.
The 5° wedge mount is perfect for reducing triggered alerts by street traffic.
3). Insert the bubble level into the mount to straighten the mount.
When the bubble level is in the middle, mark the drilling points with a pencil on the wall or brick.
Remove the bubble level after you have marked the drilling points.
4). Use the drill to drill holes according to the marked points and insert the anchors.
5). Install the wall mount to the wall with the screwdriver and mounting screws.
6). If you have followed Step 1 to install the power kit, you can connect the Remo+ Remo S video doorbell with your existing doorbell wires.
If you don’t have a chime, connect the safety fuse wire with your existing doorbell wires.
i). Insert an exposed end of the safety fuse wire and one chime wire into the wire nut, and twist it tightly.
ii). Push the safety fuse wire and the extension wire into the wall to install the doorbell to the wall mount.
7). Remove the faceplate. Fix the Remo S smart doorbell to the wall mount by inserting the doorbell screws.
8). Turn on the power in your breaker box.
If the LED indicator on the doorbell flashes blue, you can go to the software setup part below.
If not, please turn off the power and check the doorbell wiring again.
You can also take a look at this post on how to install a video doorbell.
Step 3. Remo S Video Doorbell Software Setup
Before configuring your Remo S doorbell on your iPhone or Android smartphone, make sure your phone is connected to your home 2.4 GHz WiFi (5 GHz WiFi band is not supported).
1). Download and launch Remo+ App on your mobile phone.
2). Tap SIGN UP at the bottom of the login page on your screen.
3). Input your email address and create a password. Click sign up.
4). Register your Remo S doorbell.
i). Have your WiFi password available.
ii). After you have logged into the Remo+ App, tap + icon on the screen to add the doorbell, and select your time zone.
iii). Input the password for the WiFi network and continue to the QR code scan page.
iv). Scan the QR code on the Remo Bell S when the LED indicator on the doorbell flashes blue.
v). Turn to your mobile phone’s WiFi settings and leave the Remo+ App open. DON’T close the app.
vi). Connect to the network RemoBellS-xxxxxx. If you see “internet is unavailable”, tap “okay”.
vii). After your phone is connected to the RemoBellS-xxxxxx network, go back to the Remo+ App and press continue.
It will take around 3 minutes to finish the registration process.
viii). Install the faceplate back and insert 2 security screws into the securing screw holes to fix the faceplate.
Now you are good to go! You can now get live stream on your phone and get alerts once someone presses the doorbell button.
Here is a video tutorial on how to set up your Remo S smart video doorbell.
#2. Remo+ Remo S Doorbell Hottest FAQs
If you have any questions on Remo S doorbell configuration or want some doorbell troubleshooting tips, you can check the FAQ part for the solutions.
1. How do you reset a Remo Doorbell Cam?
How do I reset my RemoBell?
Solution: Remove the faceplate on the Remo S doorbell and hold the reset button for about 5 seconds.
Wait until the LED indicator flashes blue and then launch the Remo+ App to delete the registered Remo S doorbell.
Please follow Step 3 to re-register your doorbell.
2. Do I need the cloud plan?
You can still access your RemoBell S doorbell for live streaming, get real-time notifications, see and talk to the visitors without the cloud plan.
However, it would be better to subscribe to the cloud for saving the motion-triggered videos for your later playback.
Remo+ provides 3-day FREE cloud storage. You can opt to Remo+ paid cloud plan to enjoy longer time.
3. How to reduce false alarms?
If you experience too many false motion alarms, you can adjust the PIR sensor sensitivity and define motion zones for much more accurate alerts.
Adjust the motion sensitivity for your RemoBell S:
Launch the Remo+ App -> Menu -> Devices -> Your Devices -> Motion Sensitivity -> Adjust Settings
Define motion zones for reducing false alarms:
Launch the Remo+ App -> Menu -> Devices -> Your Devices -> Motion Zone -> Adjust Motion Zone
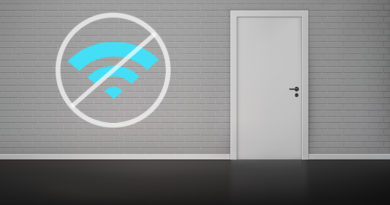
Most routers today use the same SSID for 2.4 and 5.0 wifi. Can the remo+ handle this?