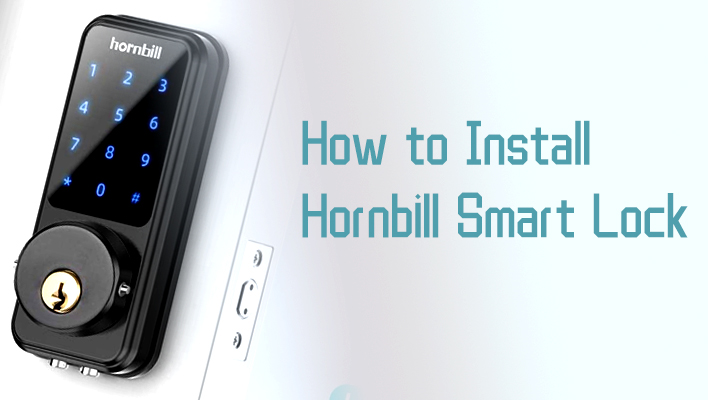
How to Install Hornbill Smart Lock – Smart Lock Installation Tutorial
Smart locks are designed for making your door more secure and smarter, but it can be challenging for people who have never installed them before. If you just bought a smart lock from Hornbill and would like to see how to get it installed.
Tools You Need:
- A screwdriver
- An electric power drill
Things You Might Wanna Know:
Do You Need an Existing Deadbolt Before Installing a Hornbill Smart Lock?
Hornbill smart locks come with a deadbolt so that you can replace your existing deadbolt lock with this new deadbolt. Or, you can add the hornbill smart lock to your door without removing your old door lock to improve the security level. But you need to make sure the distance between the holes for two deadbolts is enough so that it will not cause any conflicts. For specific specs, you need to check out the recommended diameters for different Hornbill models, which will have an installation template included.
Can I Install a Hornbill Smart Lock for Left-Handed?
Yes, Hornbill smart lock can be installed for both the left-hand door and the right-hand door. And the installation process is almost the same. You need to do a few small adjustments to make sure the deadbolt’s direction works correctly though. Don’t worry, we will cover that as well.
How to Install a Hornbill Smart Lock in Minutes
Step 1. Drill the Hole According to the Template
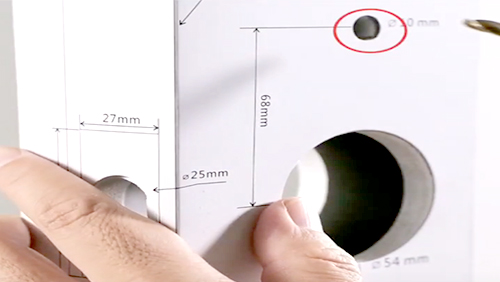
Make sure your door’s eligible for installing the Hornbill smart lock by reviewing the specs on the template. Then, use an electric drill to create a small hole for fixing the position of the smart deadbolt.
Step 2. Install the Deadbolt
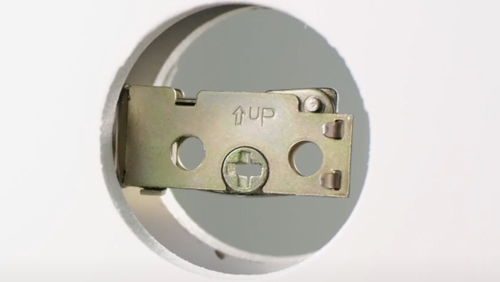
Insert the deadbolt and secure the deadbolt with screws, make sure the “Up” symbol is pointing at the right direction. (The deadbolt’s length is adjustable so you may wanna change the length by twisting the deadbolt’s body to get a desirable length for your door.)
Step 3. Install the Front Panel with Keypad
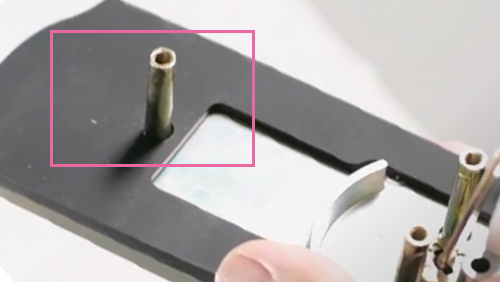
First, we need to install a long bolt so that the keypad can go through the hole that we drilled in step 1.
Place the front panel keypad into the deadbolt and you should lock/unlock the deadbolt by rotating the rod in the middle.
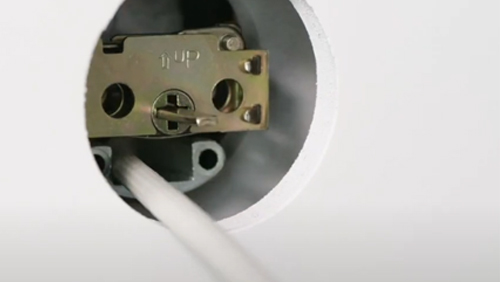
Step 4. Install the Metal Bracket on the Back
There is a metal bracket mount included in the package, and it’s easy to get it installed, you just need to install 3 screws. What is tricky is that you should place the wire to the side where there is a slender spot. Don’t let the wire go through the center hole.
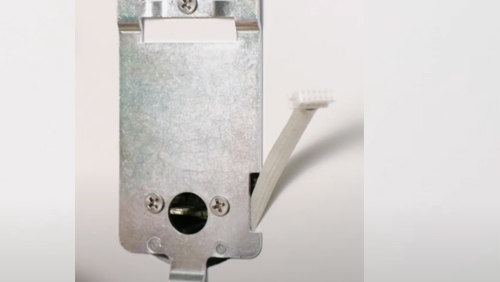
Step 5. Install the Back Panel
To install the back panel, the very first thing you need to do is to remove the cover of the battery pack by pressing the small button on the top.
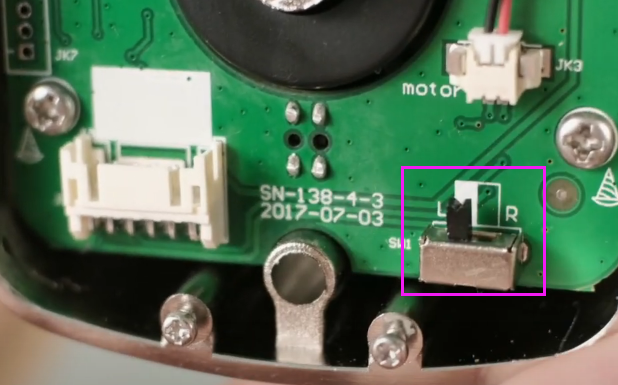
After that, choose the left-hand or right-hand option with the button on the backside of the back panel and connect the IC wire carefully. You can see the position in the picture below.
Test if the knob can lock/unlock the door, and install the screws that the back panel requires. Lastly, put the batteries in and slide the battery cover back into place. then the Hornbill smart lock is successfully installed.
If you want to use the keyhole, you can remove the cover by pressing the small dots on both sides of the keyhole cover.
Plus, there is an official Hornbill smart lock installation tutorial. If there is anything uncleared, I believe you can find the answer here.